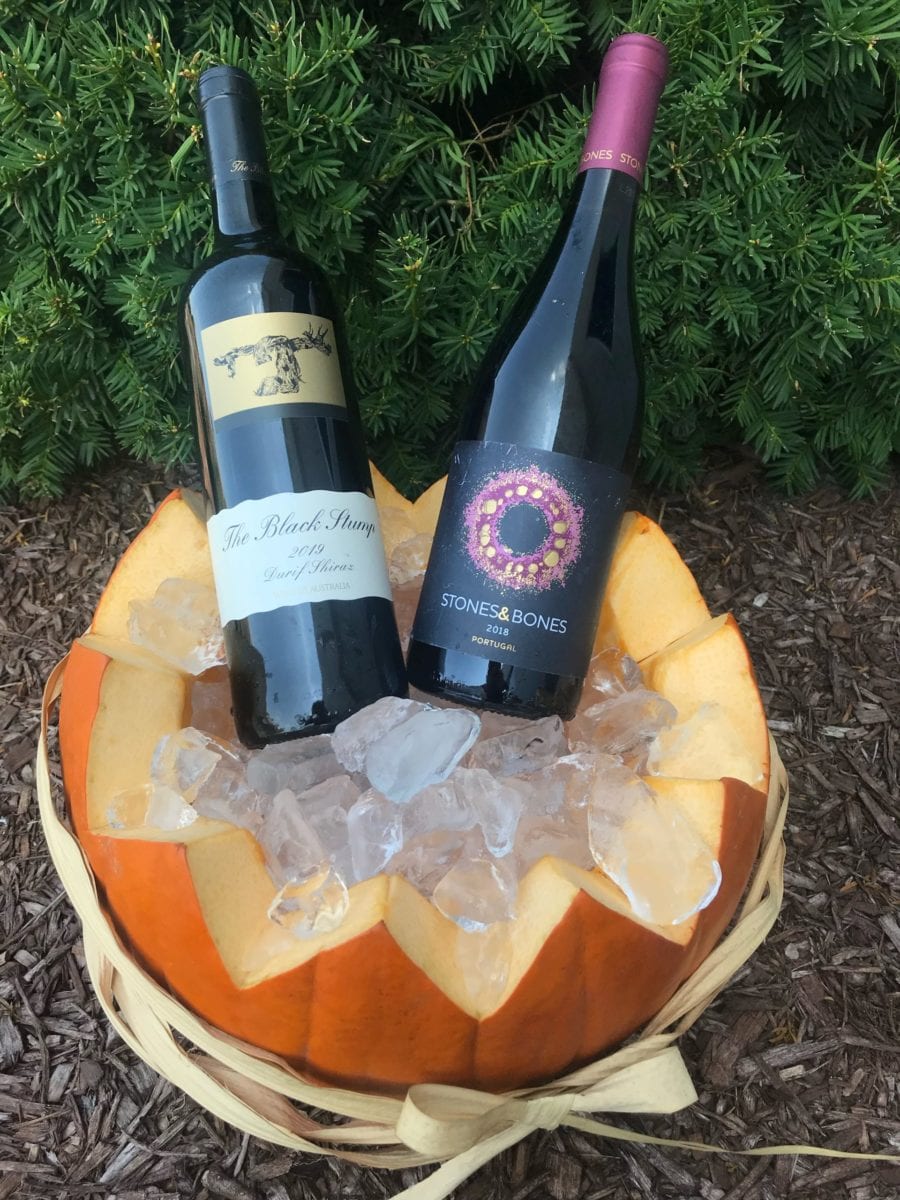
How To Make A DIY Pumpkin Ice Bucket
The fall season is setting in, and Halloween is right around the corner! We’ve combined two of our favorite things, fall and wine, for this easy DIY fall craft project. This pumpkin ice bucket is multi-functional; it adds a great touch of decor to your dinner table and keeps your wine bottles nice and chilled!
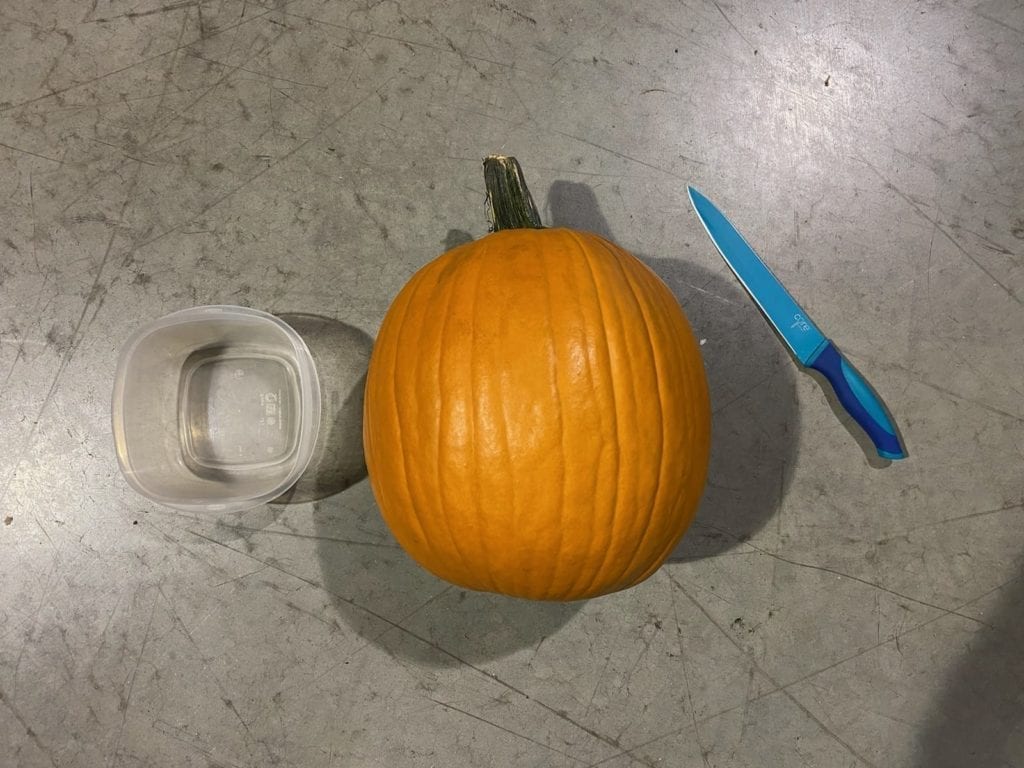
Materials
This DIY project only takes about 10 minutes from start to finish and requires just a few items. Here’s what you’ll need:
- 1 large pumpkin
- 1 sharp knife
- 1 bowl to hold seeds & pulp
- 1 pen or marker
- 1 large spoon for cleaning out the pumpkin seeds & pulp
- 1 disposable tablecloth or newspapers
Instructions
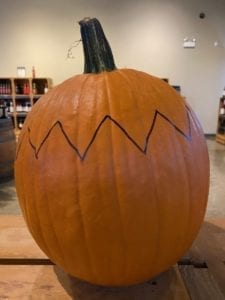
Prep Your Pumpkin
Lay out some newspapers or a washable tablecloth on your workspace. This makes cleanup super easy when you’re finished. Look at your pumpkin, and decide which is the smoothest, best looking side – that will be the front of your ice bucket. Once you’ve determined the front side of the pumpkin, turn it around to the back.
Draw An Outline
With your pen or marker, starting on the back, draw a zigzag design around the circumference of the pumpkin (about a third of the way down from the top). Each line segment should be about two inches long and create a right angle with the connecting line.
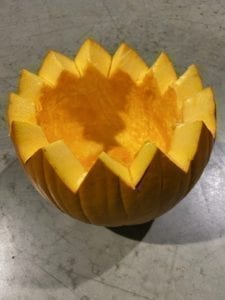
Cut Along Your Pattern
Starting from the back again, begin to cut into your pumpkin and follow the zigzag lines. If you’re using a serrated (bread) knife, use short sawing motions once it’s in the pumpkin. If you’re using a smooth bladed knife, a gentle up and down rocking motion will cut through. Continue cutting around the pumpkin, making sure you connect the cuts at each point. Once all the cuts have been made, use the stem of the pumpkin to gently pull the top off. If there is any resistance, just take your knife and cut wherever necessary.
Clean Out Your Pumpkin
Now, it’s time to clean your pumpkin out. Grab the empty bowl and a large spoon (or you can use your hands), to get all the pumpkin insides out. You want the inside as smooth as possible, but don’t worry about getting every single fiber out!
Fill And Decorate
Finally, once the pumpkin is cleaned out, wipe off any remaining pen marks. Then fill with ice and begin chilling your favorite wines! Optionally, add a few fall decorations to your finished ice bucket: raffia, bows, ribbons, etc.
Suggested Wines To Chill
With the change in seasons, we know more people are enjoying red wines. A common misconception is that red wine should always be consumed at room temperature. But some reds are, dare we say, better chilled? This ice bucket is the perfect vessel for that! Chilling reds usually works best with a lighter wine- Pinot Noir, Beaujolais, Cabernet Franc out of the Loire Valley; nothing too dry, heavy, or tannic. Looking ahead to the holidays, Beaujolais is a popular red for Thanksgiving and is the perfect wine to pop into your ice bucket (it will also make a beautiful table presentation)!
Tip: Gently chilling and lowering the temperature of a red wine will open it up and reveal lovely fruit forward notes!
Our featured Cellar Collection bottles are:
- Stones & Bones Red Blend
- The Black Stump Durif Shiraz
Suggested alternative Cellar Collection red wines to chill:

Share your wine pairing photos with us! Tag @thewinecellargroup and use #TheWineCellarGroup for a chance to be featured on our page. Join our email list for more fun wine tips, deals, and wine tasting events near you!


Leave A Comment